Biscayne National Park

Overview

Biscayne National Park covers over 172,000 acres with over 95% of the park underwater; It is considered a watery wonderland. The park protects a rare combination of aquamarine waters, emerald islands, wildlife and coral reefs. Biscayne National Park is a great place for outdoor water-based recreation—or just relaxing if you’re visiting southern Florida.

Accessibility

Biscayne visitor center is within an hour drive from both Miami and Fort Lauderdale. However, the majority of the park can only be accessed via boat or kayaking so please be prepare to book a snorkeling/kayaking/canoeing tour if you plan to visit Biscayne. All the tours are for kids over 8 except for the Boca Chita Island tour, therefore if you have little ones, you have limited access to the park.

Park Highlights

2018_Biscayne-31.jpg

Boca Chita Island Tour – We booked a 3 hours tour of Boca Chita Island, and it takes 45 minutes to travel to Boca Chita Island each way, this leaves you a little more than 1 hour to explore and enjoy the beautiful small island. The Boca Chita Island tour is run by a non-profit organization, and there are two tours per day. You can book the tour online or at their office next to the visitor center. As tip, booking tours at the office is cheaper than online. You can check out the different tours that are offered here .

2018_Biscayne-170.jpg

Exploring the mangroves – We spent hours kayaking around the mangroves near the visitor center and absolutely enjoyed all the wildlife that came out to meet us. We saw many fishes, red crabs, pelicans, but couldn’t find the famous manatees that other people were lucky to see. Kayaks are available for rental at the visitor if you cannot bring your own.

Lodging

There are two campgrounds in the park, but both are on an island that requires a private boat ride. We stayed at a hotel in Homestead since RV parks/resorts prices are as much as hotel. Please plan your lodging in advance if you decide to visit the park during peak-winter season.

2018_Biscayne-261.jpg

Closest Cities to the Park: 

Two closest big cities to fly into to visit Biscayne are Miami and Fort Lauderdale. The closest city for lodging is Homestead. If your visit is during peak season, please make sure you plan in advance and be prepare to pay a premium for basic lodging.

Recommended Length Stay: At least 3-5 days if you can charter a boat and camp at Boca Chita Island.

2-3 days if you want to visit Boca Chita Island and take a snorkeling/kayaking/paddle boarding tour.

Would we be back?  Definitely yes, whenever we are in Miami, we will have to stop by here to snorkel in the pristine water.

The Ultimate Guide to The Wave - Coyote Buttes North 

The Wave

2019_Wave-149.jpg


Overview

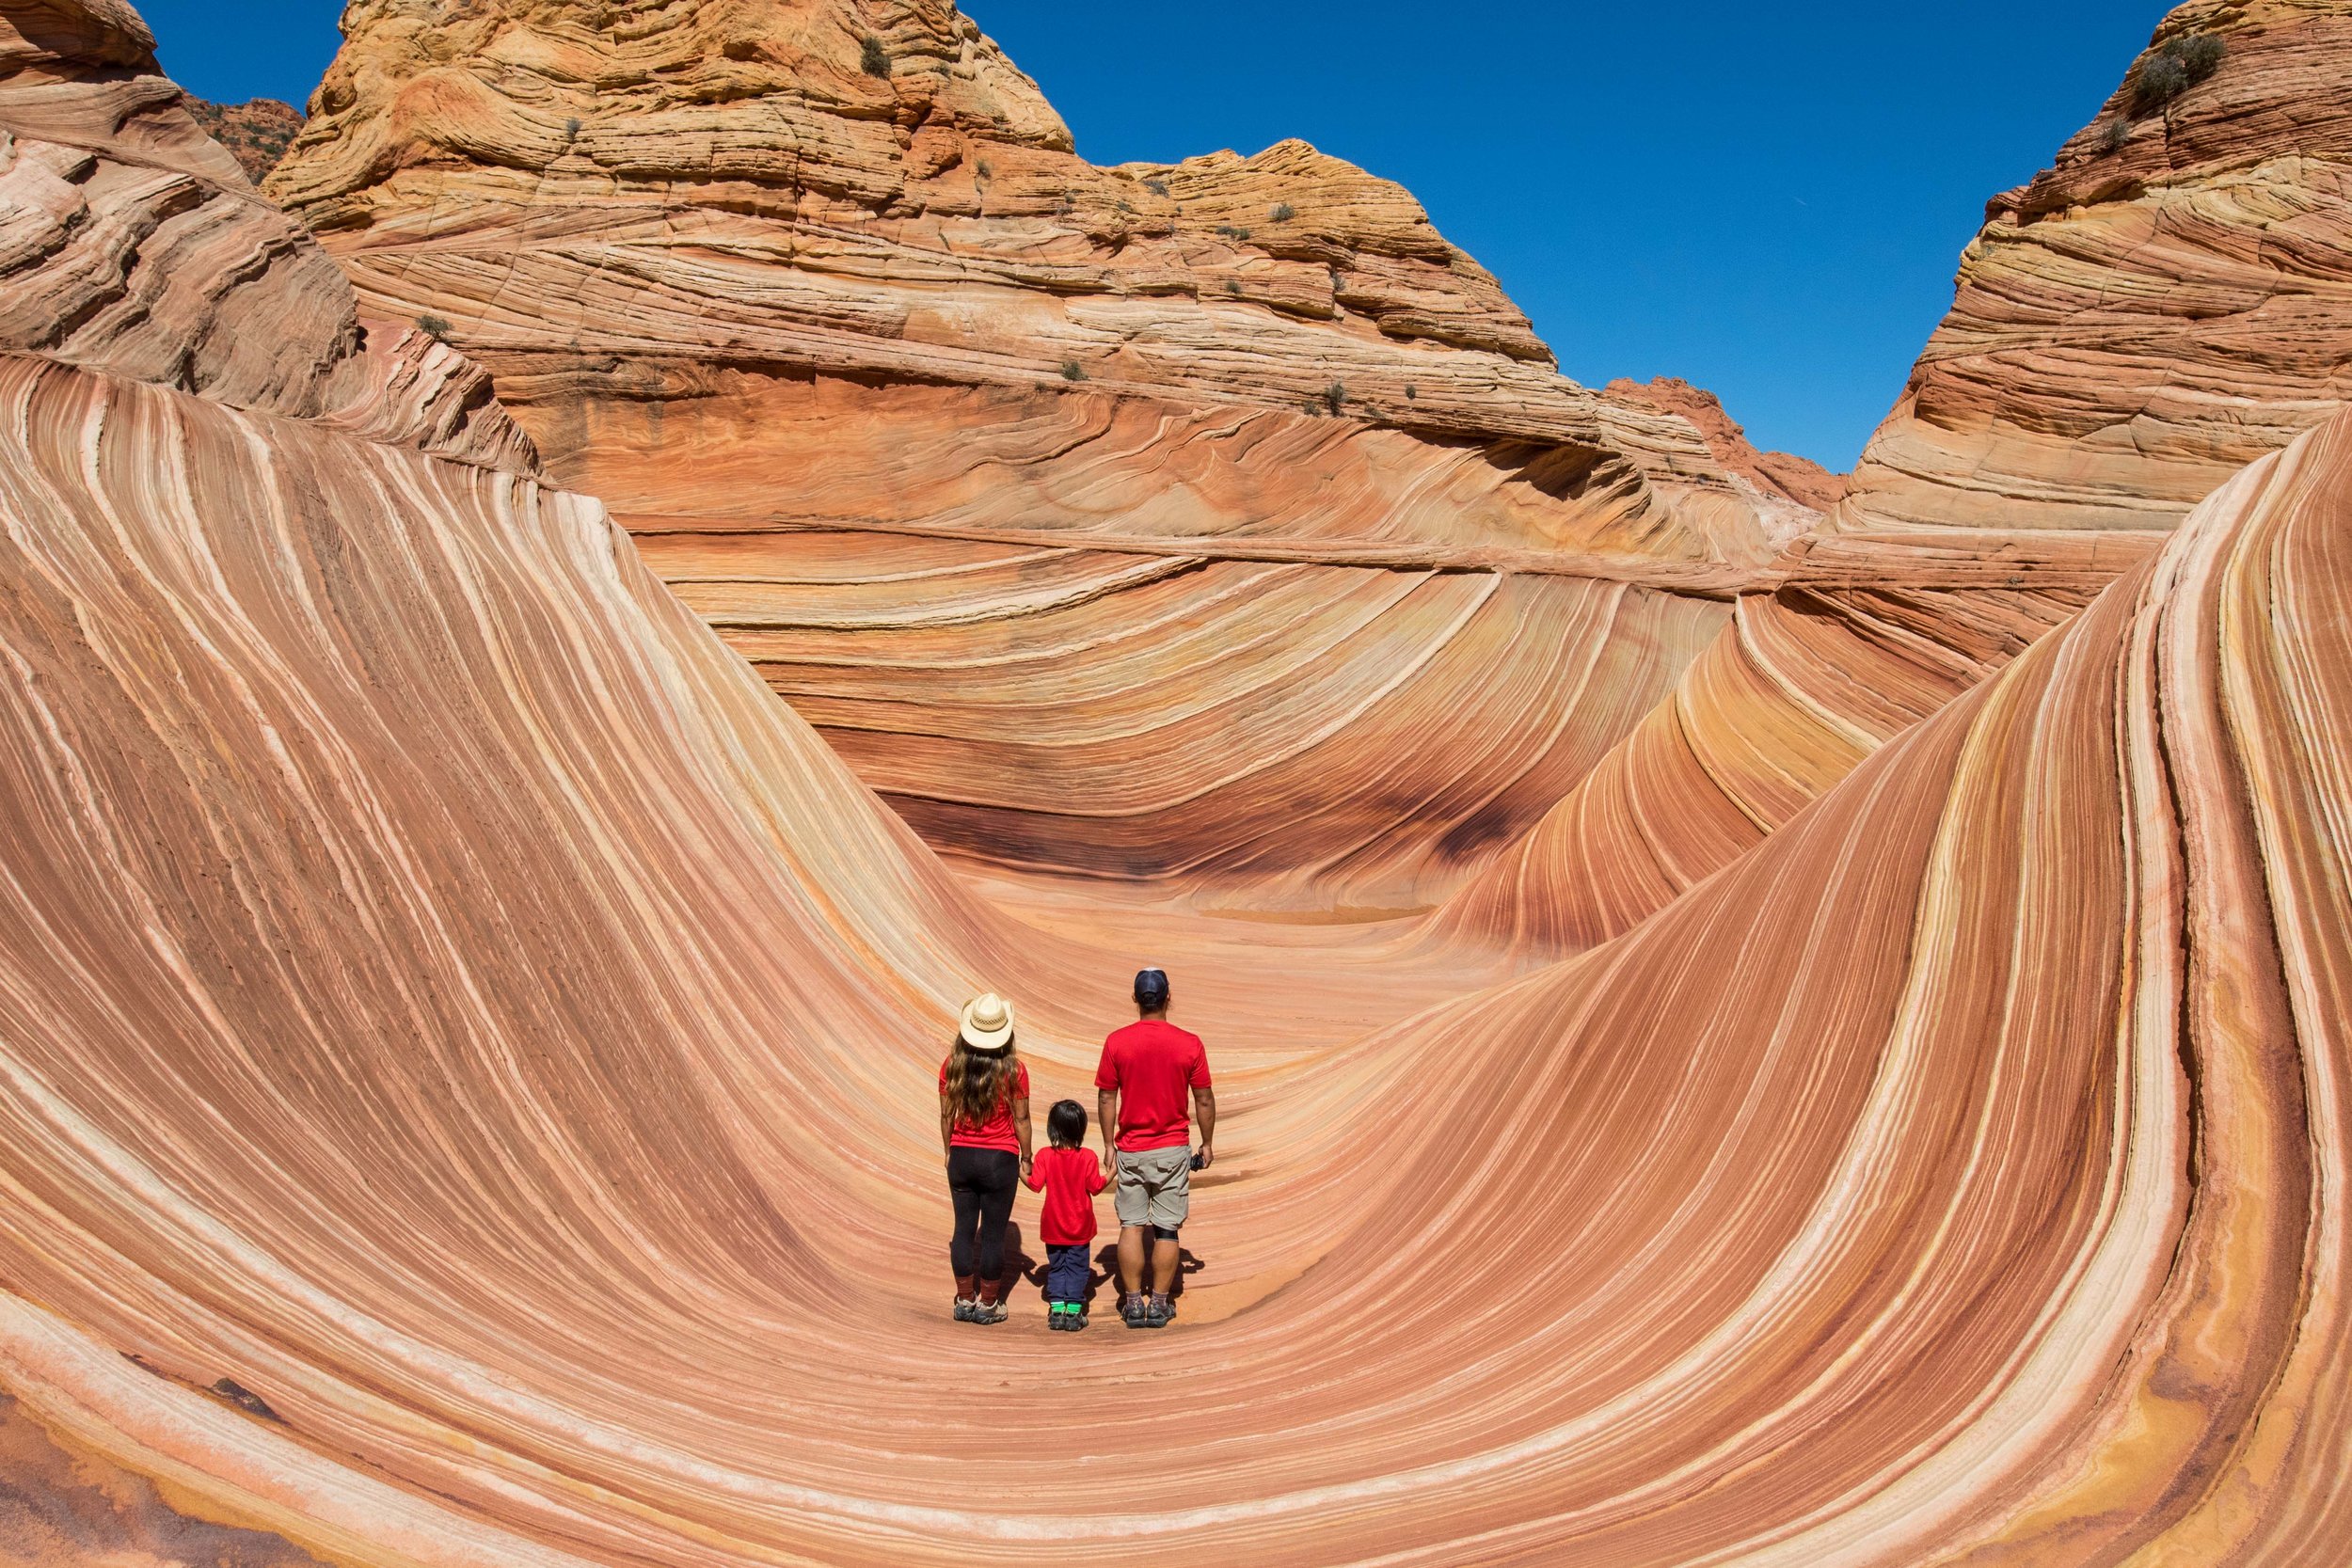
"The Wave” is part of Coyote Buttes North and require a permit to hike. Each day, only 20 lucky people get to hike this beautiful, fragile land. In 2018, approximately 160,000 people applied (online/walk-in) and only 7,300 people get the permit to hike. Each year, this number increases and it is harder to get picked but I say, try it, you just never know until you try. 

2019_Wave-11.jpg
2019_Wave-80.jpg
2019_Wave-333.jpg

How to Apply

There are 2 ways to apply for “The Wave” hike: online and walk-in. We did the walk-in process since we were in the area and decided to give it a shot! We drove 1.5hrs from Zion National park and when we arrived, there were 196 people that day waiting for 10 slots. Apparently, this is normal for April. We got picked 2nd! Below is the walk-in process! 

Walk-In Process:  

FYI: if you google it, it will say BLM Visitor Center in Kanab on google maps but it is the visitor center for Staircase Escalante Visitor Center.

FYI: if you google it, it will say BLM Visitor Center in Kanab on google maps but it is the visitor center for Staircase Escalante Visitor Center.

  • 10 permits are chosen for the next day’s hike. So, if you want to hike on Monday, you need to submit application on Sunday. 

    • NOTE: in the winter time, you have higher chances to get it as they do drawings on Friday for Saturday, Sunday, Monday. 

  • You need to arrive at the Staircase Escalante Visitor Center between 8:30am - 9:00am for submit your application. 

    • Address: 745 Highway 89, Kanab, Utah 84741

  • One person in your party will be the group leader with all of your party’s name on it. 

    • There is a max of 6 people on an application. 

    • Dogs are allowed and is not counted in the party’s number but dog needs to be on the permit and pay the $7 dollars as well.

    • There is no age limit so kids are allowed.   

    • Have your vehicles’s license plate number handy so you don’t have to walk back outside. 

    • You will be assigned a number and if your number gets chosen, you win! 

    • NOTE: You can only be on one application so please do NOT submit multiple times to increase your chances. You will be disqualified.  Also, it’s not cool so please do not this. We know someone who did this and still didn’t get chosen. Cheaters never win!  

  • Before the drawing, they do roll call and the group leader must be present in the room. If the group leader is not there, they will remove the number from the drawing. Numbers are added to the lottery bin for drawing. 

  • Drawing is at 9am 

  • Drawing process: 

    • They will draw as many numbers to total to 10 people. 

    • Example: 

      • If the first number is chosen and that group has 6 people, then 4 more slots are available. 

      • The next number is chosen and that group has 4 people, the drawing is over. 

      • But, if the next number is chosen and the group has 2, the drawing continues until all 4 slots are taken. 

      • But, if they draw a number and the party has 4 people but only 2 slots remain, you can choose to take the 2 slots (2 people from your party will not get to go) or forfeit your permit to someone else who has 2 people. 

  • If your number is chosen:

    • You stay in the room to pay (they prefer cash) and get the permit. 

    • They will also provide information on the hike and an opportunity for you to ask any questions.

    • They also have a list of guides if you prefer to hire one. We chose not to hire one because this 69yrs old Korean lady told us we can follow her since she’s been there before and can lead the way.  

  • If you do NOT get chosen, you can come back the next day and try again. They will save your application for the next day so you don’t have to fill it out again. They will do this once for you. You can keep trying as long as you want. Also, if you don’t get it, drawing for the Coyote Buttes South is at 9:30am and you can submit it from 9:00am - 9:30am. 

  • For more information: https://www.blm.gov/visit/coyote-buttes-north-the-wave


Online Process

2019_Wave-106.jpg
  • 10 permits are chosen for a specific date 4 months in advance.

  • $5 dollars (non-refundable) to submit your online lottery. If you win, you will pay $7 dollars for the permit per person.

  • To submit, here’s a link with all the information you need to know: https://www.blm.gov/visit/coyote-buttes-north-the-wave

Hiking Information

  • ALL Permits are NON-REFUNDABLE and NON-TRANSFERABLE

  • Permit is day use only; valid from sunrise to sunset so come as early as possible so you have more time to enjoy the wave and the surrounding area. Hiking to the wave is about 6miles RT but we ended up hiking 8.1miles because we explored around the area going to slot canyons, coral sand, other waves, and buttes. 

  • The turn that takes you to the trailhead is a very sharp turn and a lot of people miss it so make sure you slow down around that area. 

  • The road to the trailhead is gravel and dirt and a 4WD is preferred but not required. If you do not have a 4WD, just drive slow and you should be fine. 

  • The trailhead for Coyote Buttes North shares the same parking lot for other trailheads so make sure to look for this trailhead sign. 

  • Sign-in and sign-out on the hiking log located in the parking lot. 

  • If you don’t have a guide, you can follow the picture maps and directions they give you. 

  • The wave used to not have cell signal but we had 3G cell signal for calling. We have sprint and I think other people who had other carriers also had signal. 

  • We suggest downloading GAIA app to help track your route in case you get lost or off track. We used it and it helped us feel comfortable. There are probably other apps that works there, too but GAIA worked for many of us there. 

  • There are no mark trails but we did see 2 posts that you points you to the next part of the trail. There are also footprints from previous days so that helps as well.  

2019_Wave-98.jpg

Packing for the Wave: 

  • WATER: Make sure you bring enough water as it gets very hot on the hike, especially in middle of the summer. The suggestion is 1 gallon per person but know your body so bring sufficient about for yourself. Dehydration is the number one issue on this hike so drink lots of water. We hiked when it was 65 degrees but felt hotter because of the sun hitting the rocks. 

  • Hiking shoes: You will be hiking on mainly rocks and sand so hiking shoes with good grip is recommended. We saw people with tennis shoes and it works, too but just means you have to slow down on rocks that are a little steep. 

  • Convertible pants: Pants that can become shorts for when it gets hotter is always a plus so you can reduce what you have to carry. 

  • Layer your Clothes: We hiked in April and it was cold when we started our hike and it got warmer as the day went by so wearing multiple layers that allows you to easily remove clothes is recommended. 

  • Medicine: Whatever medicine you need for the day, make sure to pack that for the hike. 

  • Emergency Contact: pack it with you as well as tell your emergency contact regarding your hike schedule.

  • Lunch and snacks: Bring your own lunch and snacks to eat at the wave. 

  • Backpack: Bring a comfortable hiking backpack to carry all of your stuff. 

  • Electronics: Camera, GoPro, cellphone, extra batteries/memory cards for camera and GoPro, external charger if you have one. 

  • Sunscreen and sunglasses: Even if you don’t burn, it’s good to sunscreen. 

  • FirstAid Kit

  • Sandals: Not required but nice to have is sandals.  Once you get to the wave and take off your shoes and relax with sandals. A lot of people just took off their shoes and go barefoot but sandals is more comfortable and relaxing.

2019_Wave-294.jpg
2019_Wave-226.jpg

Hiking the wave with Kids

2019_Wave-146.jpg
2019_Wave-466.jpg
  • We searched online and there was only one article on TripAdvisor regarding hiking with kids and it basically said not to bring kids, especially small children. We were worried and said, if we win, then it’s meant to be that we take him. 

  • We won the lottery so we decided to take our 5 yrs old son and we are so glad we did because it was fun for him and he did great! 

  • Some things to consider if you do decide to bring your little ones: 

    • Hiking with Toddlers: Only bring your child if he/she can hike on their own for at least half of the way. Harvey hiked about 3 miles by himself there and about 2 miles back. He was more tired going back for sure and we took turns carrying him. We don’t suggest you carry your child (unless it’s a baby) the whole time because it’s a long hike and you’ll be overly tired and then it might not be fun for you. 

    • Hiking with Multiple Kids: Unless your child can walk on their on the whole time, taking 2 kids or more means both of you will need to carry a child and therefore have no one to switch if you get tired. You’ll have to make your own judgement on this since you know your hiking abilities but for us, it is nice to switch off so the other person can get a break. 

    • Bathroom Breaks: This is a long hike and it will take most of the day and therefore you will need to prepare for anything. Therefore, bring diapers/ portable pooping bags/baby wipes so if your big child needs to poop, he/she can poop in the bag. And everything you carry in, you must carry out. 

      • We hike a lot and sometimes Harvey needs to do a number two. So our hack is we bring the doggy poopy bags and he swats and poops into the bags. It’s our hack and it works for us. Luckily, that day, Harvey did not poop on the trail, he waited until we got back to the bathroom at the trailhead and did his business. Phew! 

    • Stopping: This hike has a lot of fun stuff for kids like puddles (esp after a rain), sand, pretty rocks and if your kids is like Harvey and likes to stop to play in the water or sand. This is a long hike and therefore you’ll need to minimize stopping. We started at 9:30am and so we didn’t have time to stop a lot so our suggestion is to start earlier in the day if you want your kids to play or prep them that they can play when they get to the wave. 

    • Bring a carrier: Bring a baby carrier that works for you to carry them at least half of the way. 

      • Our son is 40lbs so a baby-type carrier is a little heavy to bring on this hike. We used the piggyback rider and it’s super lightweight and easy to carry in our backpack. We are not getting paid to promote this product, just sharing what we used and that it worked for us. 

    • Snacks: Besides your regular lunch, bring extra snacks. From healthy snacks to not healthy snacks to keep them going. We also bring him reward treats while hiking so it keeps him motivated and excited. Our son loves taffy and lollipop when hiking so we bring those. 

    • Extra clothes: We always pack an extra set of clothes (shirt, pants, underwear, socks) for him just in case he gets dirty or wet. Our son hates to get wet so we always pack extra for him. We like to hike in convertible pants for our son because he can convert them to short if he gets hot. 

    • Firstaid Kit: Bring a small first aid kit for family but especially anything else needed for the little ones. Bring any meds your child might need, too. 

    • Sunblock/hat/sunglasses: Unless you are hiking in the winter time, the hike gets really hot and there is almost no shade on the trail. Apply sunblock and bring some with you on the hike. Also, bring a hat and sunglasses since there’s a lot of glare reflecting off the rocks. 

    • Keep it fun: There are lots of rock formation that looks like animals so we had him find animals or things he saw! 


Things to do around Kanab: 

  • Pink Coral Sand Dunes: 30miles away from downtown Kanab is the pink coral sand dunes. We went here after the drawing and it was very beautiful. 

  • The Grand Staircase Escalante: This park is beautiful and has a lot of hikes through so many slot canyons (zebra slot canyon, etc,..) We drove through it to get to Zion National Park and it was breathtaking. 

  • Page, AZ: An hour away from Kanab is where you can take tour through Antelope Canyon. You’ll need to book a tour with the Navajo Tribe since it’s in the Navajo Nation and the land is sacred. Also, around Page is Lake Powell and Horseshoe Bend, too.  

Carlsbad Caverns National Park

Overview

Designated as a National Park on May 14, 1930, Carlsbad Caverns National Park was established to preserve Carlsbad Cavern and more than 100 caves within the Permian-age fossil reef. This park houses a limestone chamber called the Big Room, which is almost 4,000 feet long, 625 feet wide and 255 feet high, and is considered the fifth largest cave chamber in North America.

Accessibility

Carlsbad Cavern is easily accessible for all ages, and even those on wheel chairs in the major caves. The 700+ feet elevator from the visitor center to Carlsbad Cavern makes visiting the cave easier for those that need additional help.

Park Highlights

2018_Carlsbad-28.jpg

Big Room Trail – This is largest cave chamber by volume in North America with 1.25 mile of flat trail with parts that are wheelchair accessible. The Big Room (size of 6 football fields) can be accessed via the National Entrance route (1.25 mile trail) and elevator directly from the Visitor Center. Most of the cave is well lit and there’s even a cafeteria if you need a snack and drink underground. This is the only cave we’ve seen with food sold! This was Harvey’s first big cave experience and he absolutely loved it. He enjoyed learning about the soda straws, popcorns, stalagmites, and different tiny creatures and bats that live in Carlsbad Caverns.

Rattlesnake Canyon Trail – This is a 9 mile scenic drive or hike that showcase the beautiful surrounding landscape and plants that live on the surface of the cave. We drove this trail and learn as much as we can with the self-guided brochure that is available in the visitor center.

Natural Entrance Trail – This is a 1.25 mile steep trail that takes you down to Carlsbad Caverns. We weren’t able to do this trail because Harvey was not ready for the dark cave trail. But, if you come at the natural entrance at dusk in the summer time, you can see thousands of bats fly out!! Isn’t that so cool?

2018_Carlsbad-30.jpg

Lodging

We stayed at an RV park in White City, NM, right outside of Carlsbad Caverns National Park. The RV park is very basic and on the high-end for what you get. White City is a small town with limited lodging and food options, so please plan ahead if want to visit this park. If you need more lodging, food and other amenities, the next largest city is Carlsbad, which is 23 miles from the park. As a side note, because of the oil boom that is happening in the area, hotels in Carlsbad is very expensive, so please do not be shocked if you see a Super 8 going for $200/night.

Closest Cities to the Park: 

If you’re flying in to visit Carlsbad Caverns National Park, the closest city to fly into is Carlsbad, which is 23 miles from the park. If you need to fly into a larger city, El Paso, TX, is a little more than 2 hours drive from the park.

Recommended Length Stay: At least 2-3 days to explores caves and trails outside Carlsbad Caverns.

Would we be back?  Definitely yes when we’re in the area, this is our favorite cave!

Additional Notes:

  • There’s no lodging in Carlsbad National Park, only backcountry camping.

  • Pets are not allowed in the cavern but there is a kernel at the visitor center.

  • For your safety please wear low-heeled and non-skid shoes because the caves can be steep and slippery. Bring a jacket or sweater to keep warm because the cave is at a constant 56° F.

  • Stay on trails to prevent falling into steep drop-offs. Bring a flashlight because there are unlighted passages that you can get lost in. Lastly, use handrails when available.

  • You can bring a tri-pod if you do a self-guided tour. If you attend a tour, tri-pods are not allowed as it slows down the group.

For more photos, click here.

Mammoth Cave National Park

Park Overview

With over 400 miles of cave and growing, Mammoth Cave National Park is the longest cave system in the world; covering over 52,000 acres. Mammoth cave is layered with thick Mississippian-aged limestone that’s has layers of sandstone to make this cave system extremely stable. Mammoth Cave National Park was established in 1941 to preserve the cave system. It was designated a World Heritage Site in 1981 and became the core area of an International Biosphere Reserve in 1990.

Park Accessibility

Overall, this park is easily accessible by road and many cave tours are available nearly every hour year-round (except Christmas Day). All cave tours begin and end at the Visitor Center can range from easy to difficult with tour length from one to six hours. Cave trails are lit with electric lights but some tours are pitched dark and you’ll have to carry a lantern. If you’re comfortable with dark and small spaces, you’re here for a treat! If your’e not, then this place could be challenging because the pathways are really narrow and rugged.

2018_MammothCave-119.jpg

Natural Entrance

Park Highlights

There are 17 tours but we only did 3 of the tours of the tours that fit our schedule.

Mammoth Passage Tour – This is an easy 1.25 hours cave tour that covers ¾ mile. The tour takes you through the Rotunda and a large canyon passageway to view the dripstone formations. Overall, it was the perfect short tour to give you a quick introduction to Mammoth Cave’s history. If you’re visiting the park during peak seasons, please plan in advance and book your tours here .

Historic Tour – This is a moderate 2 hours cave tour that explores 2 miles of cave system. This tour enters the cave system via a natural entrance, so please come early or plan to stay later after the tour to enjoy and experience the beauty of this natural entrance. You’re experience the Bottomless Pit and squeeze through Fat Man's Misery which is a really narrow pathway to get through.

Domes and Dripstones Tour – In this tour, you’ll ride a 10 minute bus ride to get to sink-hole/man-made entrance that takes you through a ¾ mile cave system. The tour begins with a descend of approximately 280 stairs then takes you through various sizes of domes and pits, and ends with a short walk through a variety of dripstone formations. If Mammoth is your first cave visit, this tour is a must as it showcase very unique decorative dripstone formations that must be experienced.

2018_MammothCave-90.jpg
2018_MammothCave-3.jpg
2018_MammothCave-192.jpg

Lodging

Camping: There are campgrounds in the Mammoth Cave National Park and you can find more information here. Unfortunately, the park’s campgrounds near the visitor center were closed during our visit so we stayed at an RV park right outside the park. The closest city to the park’s main entrance with hotel and motel options is Park City. We stayed at the Diamond Caverns RV Resort & Golf and it was an ok place to stay. We would not stay there again due to lack of wifi on site and limited facilities in the winter. It was also a little pricy for what you get.

Lodging: The other lodging in the park can be booked here.

Closest Cities to the Park: 

The easiest city to fly into and visit Mammoth Cave National Park is Nashville, TN or Louisville, TN which is about 2 hours from the park.

Recommended Length Stay: 2-3 days visit would be adequate to explore the park and complete several cave tours.

Would we be back?  Yes if we’re driving through Nashville, TN.

Additional Notes:

  • Free entrance to the park but you will have to pay for the tours.

  • Tri-pods are not allowed on the tours so increase your ISO!

  • Tours are great for kids but it is a little dark on some places so prep your kids.

For more pictures, click here.

Hot Springs National Park

Park Overview

Created by the United States Congress in 1832, before the national park, Hot Springs National Park is to be preserved for recreation. The hot springs flow from the western slope of Hot Springs Mountain, and the park manages the conservation of the production of uncontaminated hot water for public use.

Park Accessibility

Hot Springs National Park is located downtown of Hot Springs, Arkansas (home of Bill Clinton). There are paved roads to drive through the park and to trailheads for hiking. Overall, the park is easily accessible by vehicle and small enough that you can visit and explore within a day or two. There are no public bathhouse or hot springs for the public to use. There are currently 2 operating bathhouses on bathhouse row. Buckstaff (traditional bathhouse) and Quapaw bathhouse (non-traditional bathhouse). Kids are not allowed in the bathhouses so this is not a place for kids if you want to experience the bathhouses. We traded turns going to them so that is how we were able to enjoy it. Something to do think about before heading here.

It is open all year long except for Christmas, January 1, Easter Sunday, 4th of July, and Thanksgiving.

Our Park Highlights

2018_Hotsprings-72.jpg

Buckstaff Bathhouse – Buckstaff is one of the preserved bathhouses on the main strip of bathhouses in downtown Hot Springs. Buckstaff provides the traditional bathhouse experience and is a must visit if you’re curious about the traditional bathhouse process and equipment. You can find more information about Buckstaff bathhouse and theire services here.

2018_Hotsprings-48.jpg

Visitor Center

is also a museum to a real bathhouse where you can experience this!

Fordyce Bathhouse Visitor Center (Open daily 9:00 a.m.-5:00 p.m.) – The visitor center is a historic building that serves as a museum. We went in the winter time and there wasn’t that many visitors at the museum. We went in and we were alone and it was a little spooky walking through this old bathhouse. A very cool (pun) eerie place to walk around by yourself. Harvey was a little freaked out so we left and daddy was there by himself taking photos. He, too got a little freaked out and left and did not finish the museum. Boo!

Lodging

Hot Springs National Park has a campground that accommodates both tent camping and RVs. If you need other accommodations, there are plenty of hotels that are within walking distant to the park’s visitor center and historic bathhouses in downtown Hot Springs, Arkansas. We heard the old hotels are haunted so stay there and tell us if it’s really haunted!

Closest Cities to the Park: 

The closest and easiest city fly into and visit Hot Springs National Park is Little Rock, Arkansas, which is 53 miles from Hot Springs, Arkansas.

Recommended Length Stay: 1-2 days visit would be adequate to explore the park and bathhouses. If you are there in the high season (summer and spring time), make sure to make reservations ahead of time at the bathhouses.

Would we be back?  Yes if we’re driving through Hot Springs, Arkansas.

For more pictures, click here.

Big Bend National Park

Park Overview

Established in 1935, Big Bend National Park preserves the largest tracts of Chihuanhuan Desert topography and ecology in the United States. With about 801,163 acres of land, the park protects more than 1,200 species of plants, 450 species of birds and 56 species of reptiles, and 75 species of mammals. A unique geological feature of the park is that it has large sea fossils, dinosaur bones, and volcanic dikes.

Park Accessibility

Located in West Texas, bordering Mexico, Big Bend National Park is one of the more remote parks to visit. The majority of the park requires a vehicle, sometimes a 4x4, to reach but most roads are paved. Overall the park has plenty of easy to drive to beautiful viewpoints if you don’t have the time and/or energy to hike. However, if you do have the desire to experience the raw side of the park, Big Bend will likely be your hiker’s paradise. With over 150 miles of hiking trails and elevations ranging from 1,800 ft to 7,800 ft. Big Bend National Park will surely make you want to extend your stay at the park, it surely did for us. This park is for all ages and definitely a place to take kids. Harvey loved it. The park is open year around but peak season is during the winter time due to extremely hot weather in the summer. Many of the visitor centers and facilities are closed during the summer so something to note. And if you are brave enough to come here, please bring lots of drinking water.

Park Highlights

2018_BigBend-305.jpg

Balance Rock

Grapevine Hills Trail (Balance Rock Trail) – This is a 2.2 miles round trip trail that leads you to the balanced rocks. The trail is mostly flat in the beginning then climbs steeply the last quarter mile into the boulders. Harvey loved this trail, especially towards the end because of the fun rounded boulders that you can climb on. Additionally, lots of desert animals may come out to say “hi”. We saw lizards, quails and heard that someone saw a tarantula. The drive to the trail head is gravel with a few rocky dips that should be driven with care to prevent damaging your vehicle or getting stuck. This is a must hike at Big Bend!

Santa Elena Canyon Trail – This is a 1.7 miles round trip trail that is a must visit at Big Bend National Park. This trail takes you into the breathtaking1,500 feet high walls of Santa Elena Canyon. Hiking into the canyon will quickly make you feel how small we are, and how grand mother-nature’s landscape is. Harvey loved this hike because of the muddy river you cross to get into the canyon. Additionally, there were many bugs crawling around in the parking lot like the stick bug. As a side note - If you’re visiting the park without a child or with a older children, kayaking through the Santa Elena Canyon is an absolute must. There are kayaking tours that you can signup for or you can bring your own kayaks and bicycles to complete your trip!

2018_BigBend-252.jpg

Santa Elena

Lodging/Camping

2018_BigBend-39.jpg

Chisos Basin Campsite

We camped in Chisos Basin Campground and couldn’t have been happier because of the beautiful Chisos peaks that surround this campground. Not only is this campground spectacular during the day, but the remoteness of the park allows you to easily gaze at the milkyway and major stars at night. Winter is peak season for the park, and there are a total of 60 sites with 26 sites that can be reserved online so please plan in advance or come early in the day if you will be visiting during peak season. There are other campgrounds inside the park and you can find more information about them here. If camping is not your thing, the park also offers other lodging options and you can find more info about them here.

Closest Cities to the Park: 

The closest flying city to visit Big Bend National Park is San Antonio, TX. You will have to drive about 6 hours to get to the park but it is SO worth it!

Recommended Length Stay: At least 3-5 days to see key highlights of the park. Would we be back?  Definitely yes when we’re back in San Antonio, Texas.

2018_BigBend_a-7.jpg

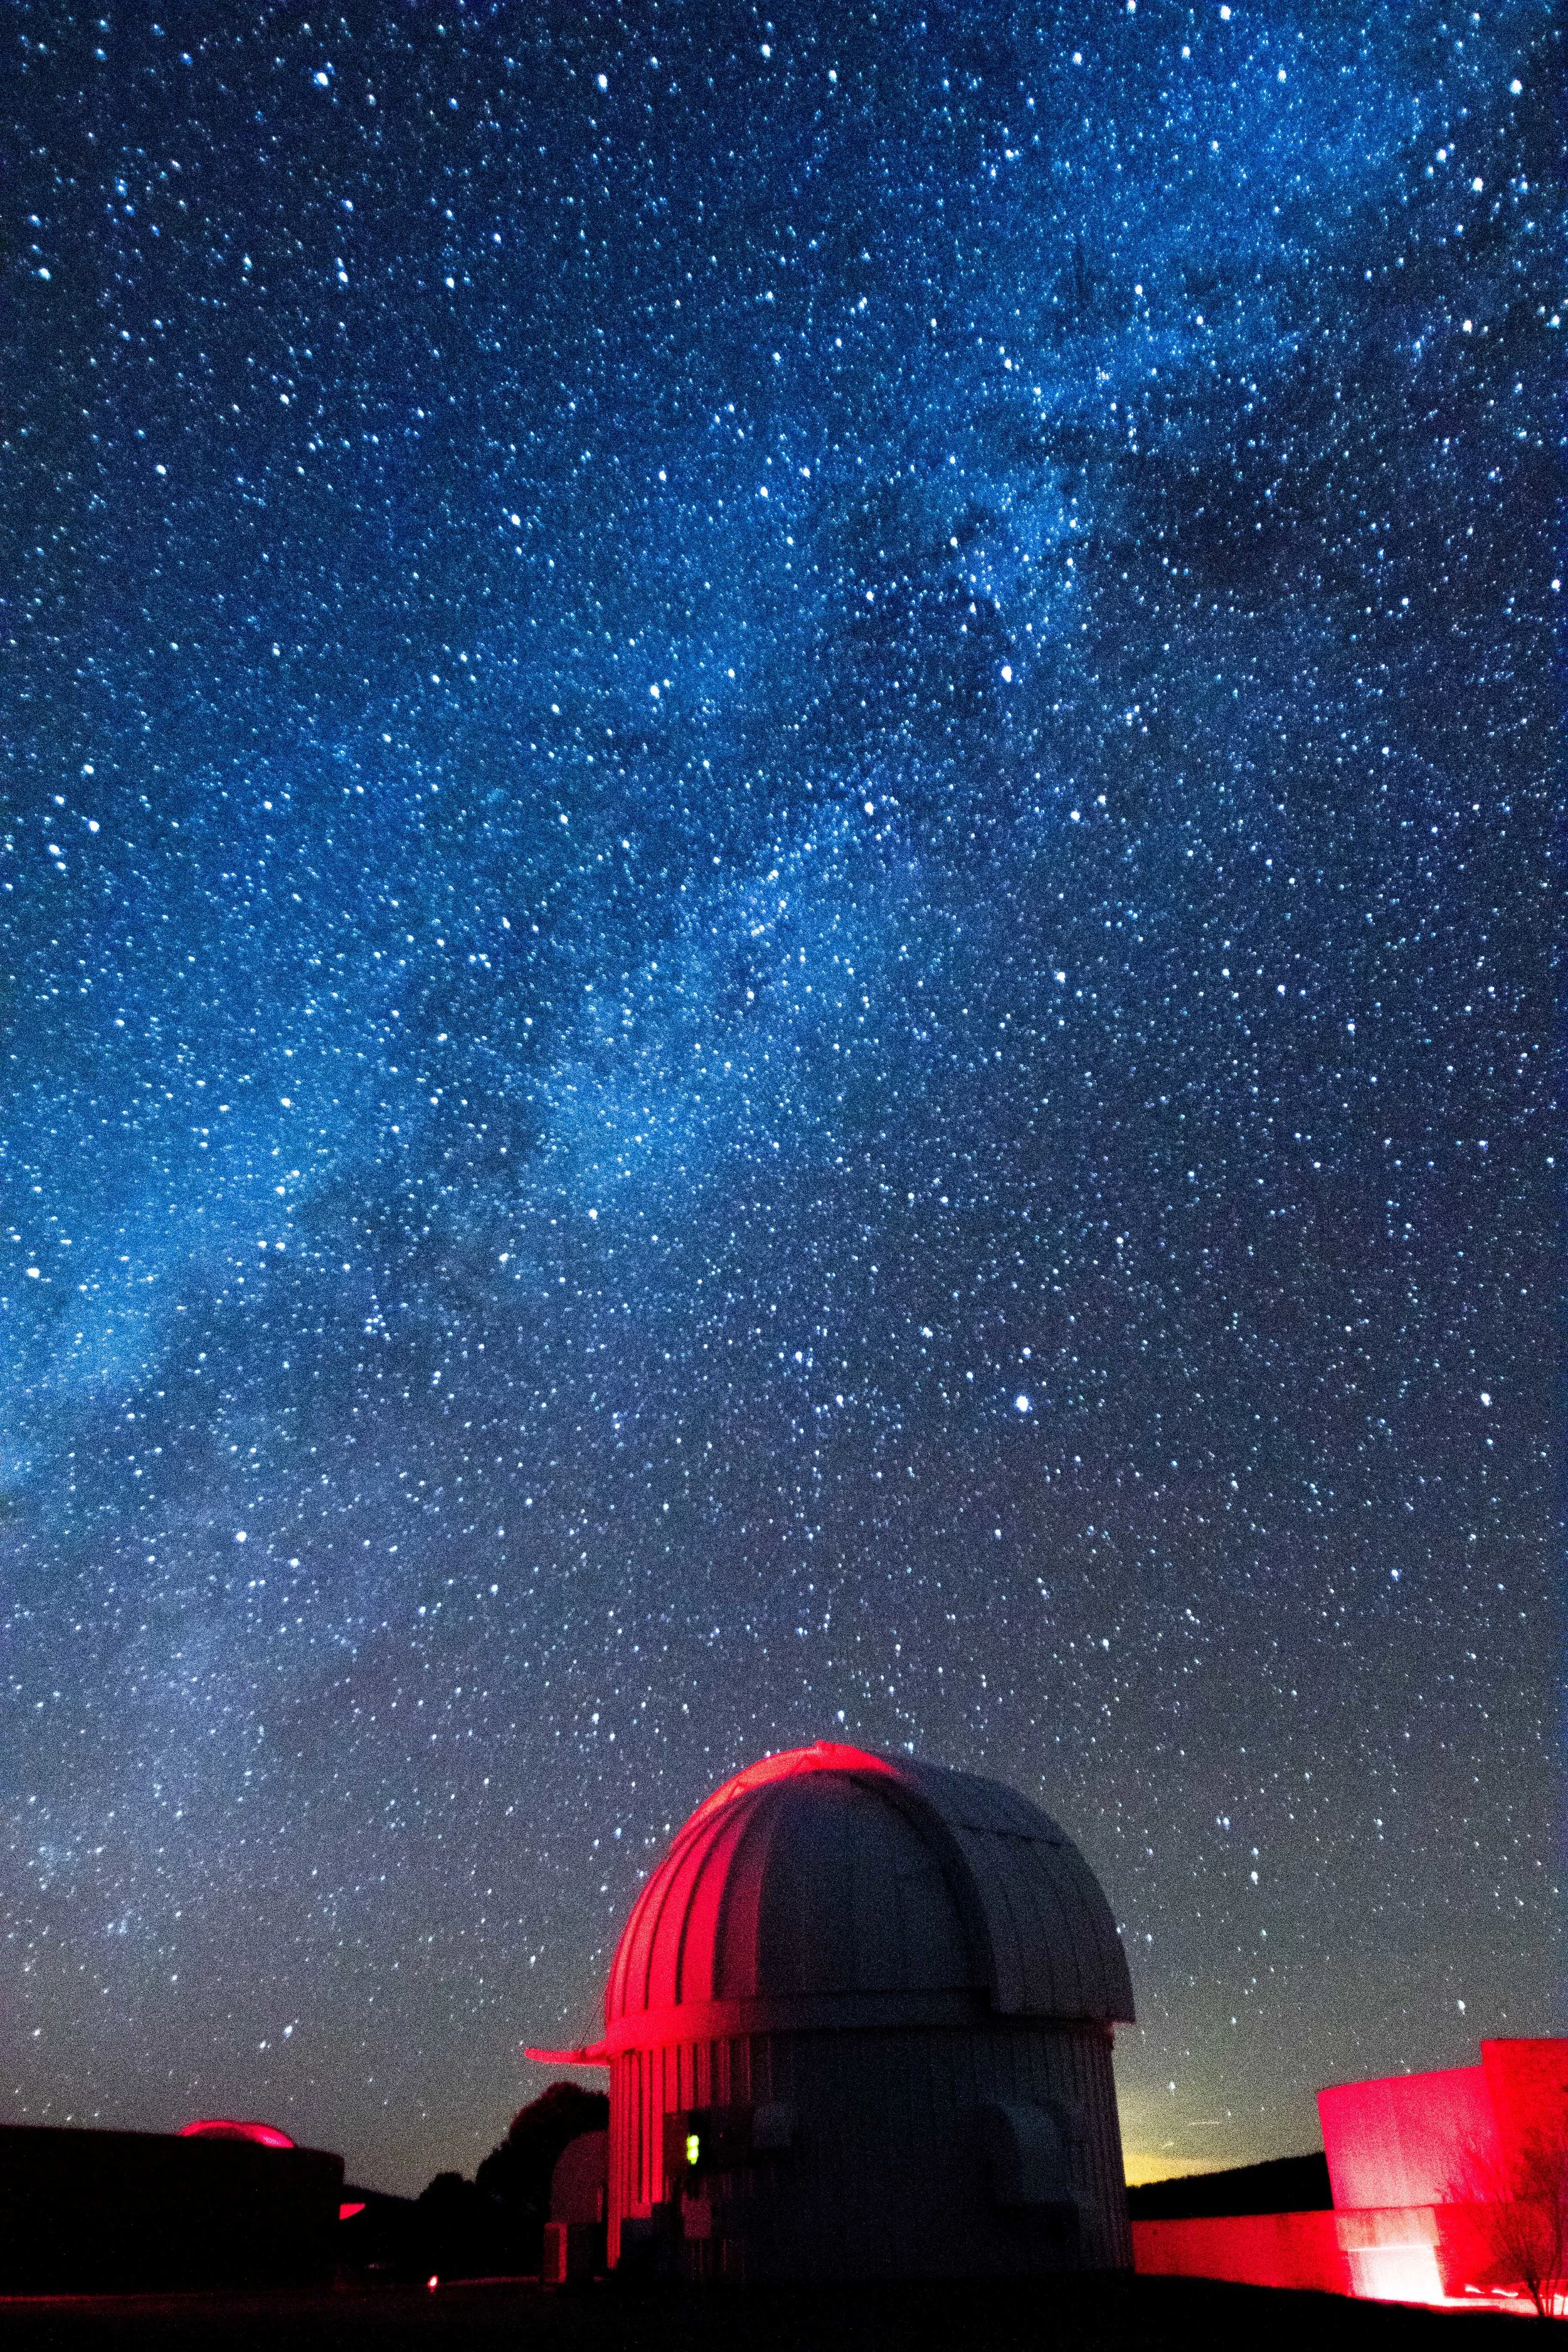
Additional Notes: If you have never been to an observatory, McDonald Observatory is a 4 hours drive from the park and tickets to the Star Party can be purchased online here. We visited McDonald Observatory and it was really a great experience to see the galaxies, nebulas, and other stars far far away from telescopes. Harvey really like using the telescopes and seeing the stars! We also snapped some photos of the Milky Way while we were there and it was pretty amazing!

Guadalupe Mountains National Park

Overview

100 miles east of El Paso and 40 miles southwest of Carlsbad Caverns National Park is the Guadalupe Mountains National Park. This less heard of park is the world's most extensive Permian fossil reef and home to Texas’ four highest peaks.  If you’re an energetic hiker who wants to explore vast wilderness, this park should be on your list of place to visit. 


Accessibility

The majority of the park is wilderness and therefore requires lots of hiking to see and experience the views and animals that live in the park. The visitor center and only drivable campground is in Pine Springs, which 100 miles east drive from El Paso our 60 miles drive from Carlsbad.  If you have time and want to experience the raw side of the park, you can drive 2.5 hours to the north entrance via Dog Canyon.  


Park Highlights

2018_Guadalupe-23.jpg

Smith Spring Trail – This is bird watcher’s paradise trail that is 2.3 miles round-trip.  Although we didn’t see any mule deer or elk on our hike, we were able to sneak up on a several wild boars feeding near the creek.  As we were finishing our hike later in the day, we could hear more animal noises in the bushes and trees.  

Devil’s Hall Trail – This is a 4.2 miles round-trip hike leads you to the Hiker’s Staircase (a natural rock stairway) and ends at a narrow canyon called Devil’s Hall. The trail is moderate with minimal elevation change.  We ran out of time and was not able to finish the trail.

Guadalupe Peak Trail - You can climb to Texas’ highest point (8,751 feet, or 2,667 meters). The trail is very steep and some areas are exposed to cliff edges. The park rates as strenuous, with 3,000 feet of elevation gain. The round trip distance is 8.4 miles, and generally takes 6-8 hours. Avoid the peak hike during high winds and thunderstorms.

2018_Guadalupe-156.jpg

If you have more time, we would highly recommend that you drive 1.75 hours from Pine Springs to the Salt Basin Dunes and explore the wilderness of Guadalupe Mountains via the north entrance.  Be prepare to bring extra water and fuel the Pine Springs has limited facilities.  The closest gas station from Pine Springs is in White’s City, which is roughly 35 miles east of the campground. 

Lodging

We stayed at Pine Springs campground because of its ease of access.  The campground is a parking lot and access to majority of the hikes in the park. This is a walk-up campground with minimal facilities so the daily rate is $8/night. 

Closest Cities to the Park: 

The closest city to Guadalupe Mountains National Park is Carlsbad, but flying into El Paso is the easiest and probably the cheapest option.

Recommended Length Stay:  At least 2-3 days to hike and explore the park.  If you’re hungry for raw wilderness, 3-5 days should allow you to explore the backcountry and camp in several remote campsites deep inside the park.

Would we be back?  Yes if we’re driving east from El Paso.

For more photos, click here.


Saguaro National Park

Overview

Home to the giant saguaro cactus, Saguaro National Park houses more than 1,160 plant species. Located in southern Arizona, the park covers over 142 mi² and provides a safe haven for many wildlife. 

Accessibility

The park is relatively accessible by car from both west and east entrance.  In the western Tucson Mountain District, Signal Hill Trail leads to petroglyphs of the ancient Hohokam people.  The visitor center is located near this entrance. In the eastern Rincon Mountain District, Cactus Forest Drive is a loop road with striking views of the desert landscape.

Park Highlights

2018_Saguaro-25.jpg

Bajada Loop Drive – This is a 5-mile drive that includes the Hohokam Road and par of the Golden Gate Road. This dirt road offers an amazing sunset view of the park with the highest concentration of saguaro cactus plants.  If your lucky on the right day and at the right time, you will able to see the saguaro cactus golden glows.  We were very lucky on our first day to the park and was able to see the amazing golden glow.

Cactus Garden Trail – Behind the Red Hills Visitor Center lies the most concentrated grouping of saguaro cactus.  This roughly 1-mile developed trail will take you around the back of the Visitor Center to see the countless wild saguaro plants that are native to the region.

2018_Saguaro-150.jpg

Valley View Trail – This is a 0.8 mile round trip developed trail that takes up a vista point to see the western peaks of the Tucson Mountain.  The trail has many detours that will take you to different areas of the Bajada Loop Drive so feel free to explore and get lost a little when you’re here.

Signal Hill – Towards the north end of the Bajada loop is a 0.3 mile round trip hike that takes you to see dozens of drawings etched into rock.  These have been dated from the Hohokan period, 450-1450 CE. 

Lodging

The park has limited backcountry camping that requires permit so please check with https://www.nps.gov/sagu/planyourvisit/camping.htm if you plan to camp.  There’s no camping accommodation for RV or trailer, so we had stayed at a nearby hotel.

Closest Cities to the Park: 

Right on the outskirt of the park is Tucson, and you can fly into Tucson International Airport (TUS) to visit the park.  

Recommended Length Stay:  At least 2-3 days to check out the different trails that the park has to offer.

Would we be back?  Maybe, if we’re in the area for business for a family event.

Fore photos, click here.